


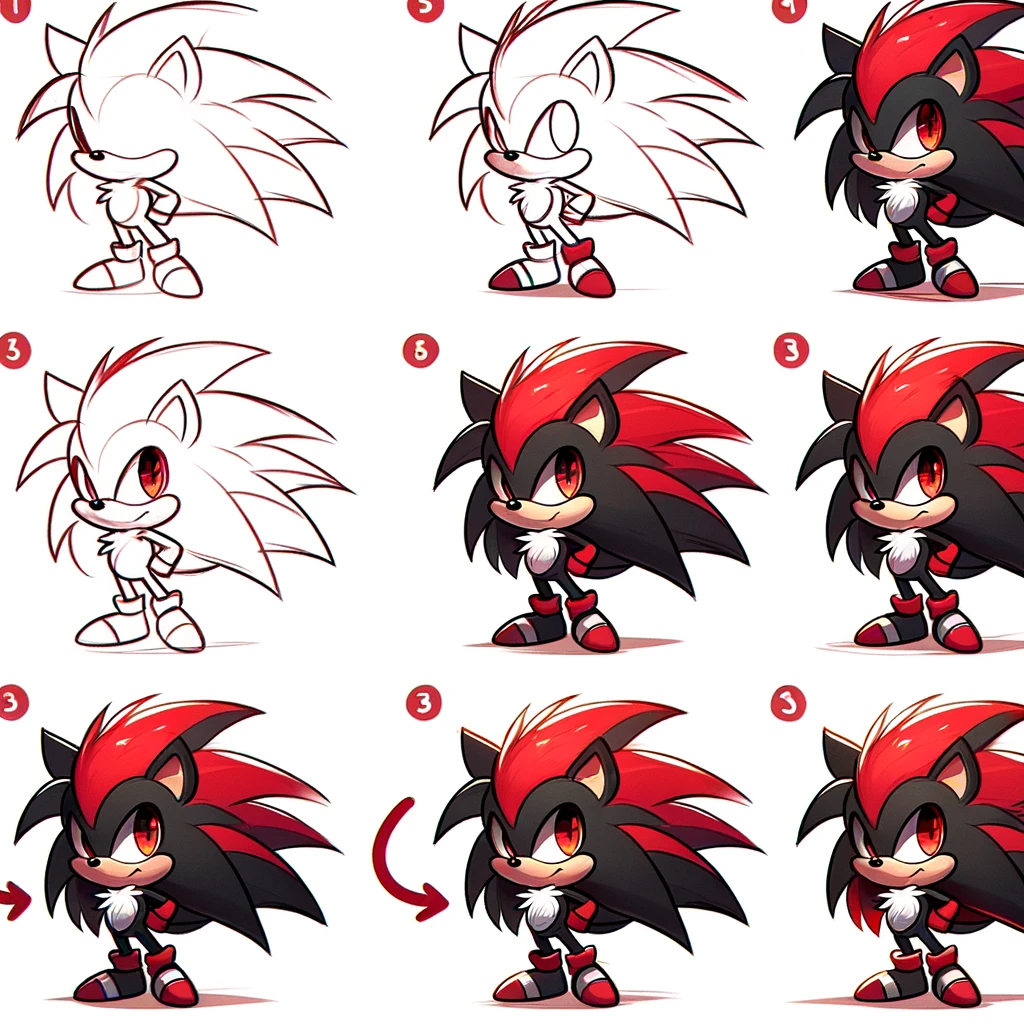
Draw a Shadow: Step-by-Step Guide
Introduction Are you ready to dive into the world of cartoon drawing? Our beginner-friendly guide will show you how to draw a charming anthropomorphic hedgehog
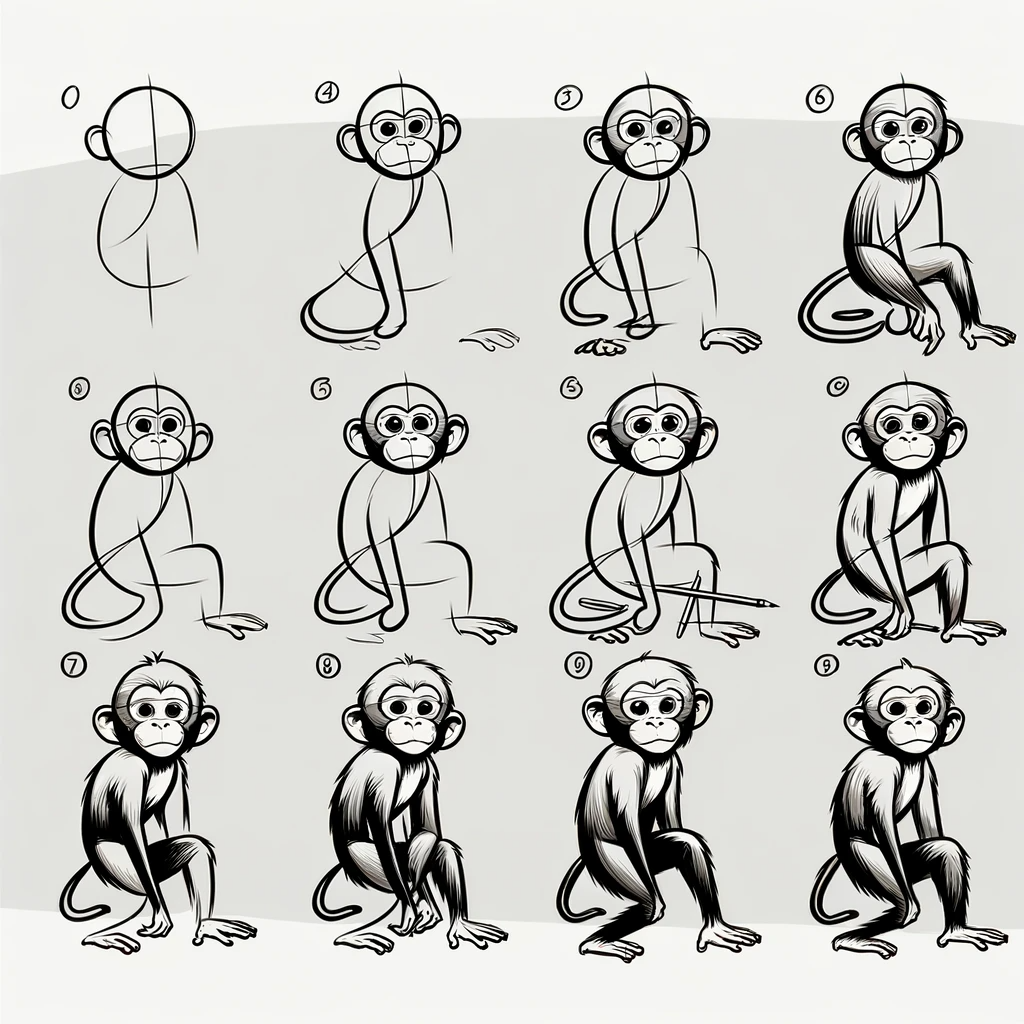
Easy Guide to Drawing a Monkey: Step-by-Step Tutorial
Introduction Ever wanted to draw a monkey but didn’t know where to start? Our beginner-friendly guide will take you through the simple steps of drawing
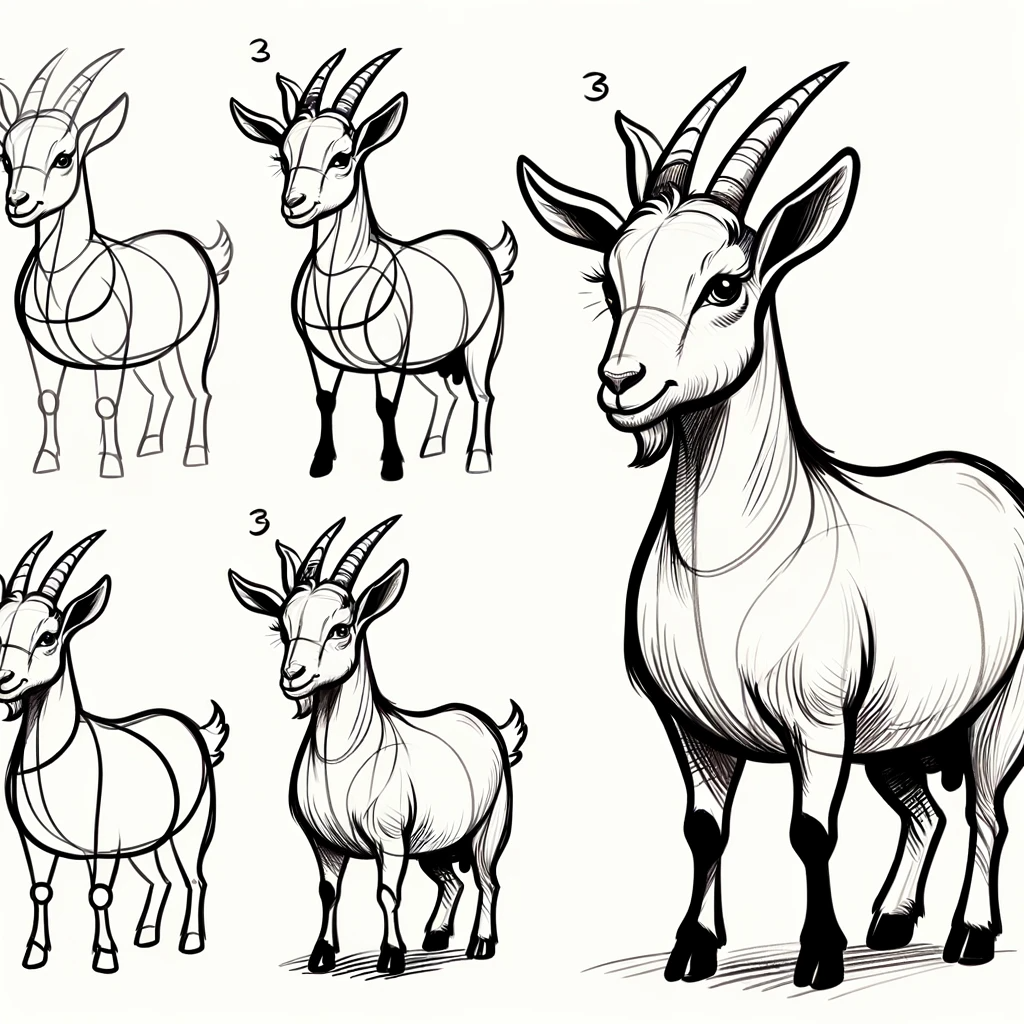
Beginner’s Guide to Drawing a Goat: Step-by-Step Tutorial
Introduction Welcome to our easy, step-by-step guide on drawing a goat! Tailored for beginners, this tutorial will walk you through the process of creating a